
Welcome to Murgaboo Quilts!
Blog posts
View all-
Aurora and Sunset Blog Hop
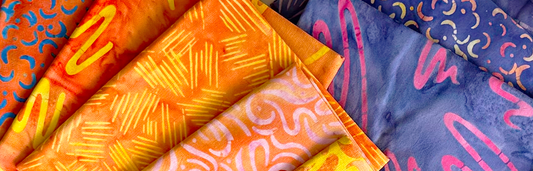
Welcome to the last day on the Aurora and Sunset blog hop! Have you been enjoying all the beautiful projects my fellow Certified Instructors shared? I'm excited to share my...
Aurora and Sunset Blog Hop
Welcome to the last day on the Aurora and Sunset blog hop! Have you been enjoying all the beautiful projects my fellow Certified Instructors shared? I'm excited to share my...
-
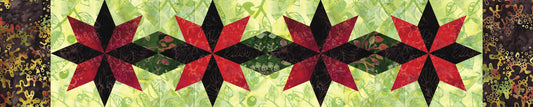
Forest Flora Blog Hop!
Welcome to my day on the Forest Flora blog hop! Deb has designed a brand new collection for Island Batik that was inspired by the warm colors of fall. The...
Forest Flora Blog Hop!
Welcome to my day on the Forest Flora blog hop! Deb has designed a brand new collection for Island Batik that was inspired by the warm colors of fall. The...
-
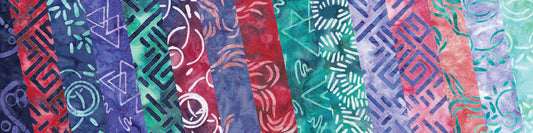
Bubbles, Curves and Corners Blog Hop!
Welcome to my day on the Bubbles, Curves and Corners blog hop! I'm so excited to share my project with you made from this gorgeous collection designed by Studio 180...
Bubbles, Curves and Corners Blog Hop!
Welcome to my day on the Bubbles, Curves and Corners blog hop! I'm so excited to share my project with you made from this gorgeous collection designed by Studio 180...


